The Warehouse
| The Warehouse | |
| File:TheWarehouse.png | |
| Description | |
|---|---|
| Bots manage a complex warehouse deep in the ground at [-1847, 41, -2641]. | |
| Access | |
| Coordinates | X: -1847, Y: 41, Z: -2641 |
| Suggested Level | 90 |
| Difficulty | Medium |
| Length | Long |
| Estimated Time | 3m |
| Involved Lootrun | The Corkus Traversal |
| General Information | |
| Type of Cave | Cave Complex |
| Loot Chests | 6x Tier 1 [✫✫✫✫] 3x Tier 2 [✫✫✫✫] 3x Tier 3 [✫✫✫✫] |
| Mobs | Guardian-Bots (Lv. 95) Energised Mechs (Lv. 95) Worker-Bots (Lv. 95) Red Energy Key (Lv. 25) Lime Energy Key (Lv. 25) Energy Turrets (Lv. 95) Cyan Energy Key (Lv. 25) Control Panels (Lv. 95) Purple Energy Key (Lv. 25) |
| First-Time Clear Rewards | |
| +400000 XP | |
The Warehouse is a Cave Complex found in the Scraplands. It is one of the caves that must be done in order to unlock The Corkus Traversal.
Primary Entrance
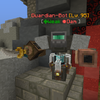
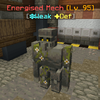
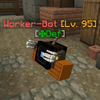
The main entrance to the Warehouse is guarded by several Guardian-Bots. Several Energised Mechs will be in the warehouse and will start rushing towards you. A safe spot can be found by taking a quick left in the first corridor, which also has a Tier 1 [✫✫✫✫] Loot Chest. After the corridor is a drop into water, alongside several Worker-Bots as you enter a maze.
| Image | Name | Level | Health | AI Type | Abilities | Elemental Stats | Drops | Location |
|---|---|---|---|---|---|---|---|---|
|
Guardian-Bot | 95 | 12000 | Burst Ranged | - | ✤ Weak ✹ Dam |
- | The Warehouse |
|
Energised Mech | 95 | 9000 | Melee | - | ✽ Weak ✦ Def |
- | The Warehouse |
Secondary Entrance
The secondary entrance can be found at -1858, 33, -2691, and starts off as a simple parkour section before turning into a running section, requiring you to avoid several Guardian-Bots firing at you. Inside the section are several holes, some of which have some Tier 1 [✫✫✫✫] Loot Chests, such as the one found straight ahead from the entrance. After the running section, you drop down into the maze.
| Image | Name | Level | Health | AI Type | Abilities | Elemental Stats | Drops | Location |
|---|---|---|---|---|---|---|---|---|

|
Guardian-Bot | 95 | 12000 | Burst Ranged | - | ✤ Weak ✹ Dam |
- | The Warehouse |
Storage Room
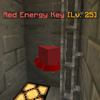
Inside the maze are two keys that are used to progress, the Red Energy Key, and the Lime Energy Key. All the points of interest in the maze are listed below:
- Red Energy Key: -1797, 27, -2639
- Lime Energy Key: -1799, 27, -2661
- Red Door: -1783, 33, -2670
- Lime Door: -1779, 31, -2658
- Tier 1 [✫✫✫✫] Loot Chest: -1791, 27, -2660
| Image | Name | Level | Health | AI Type | Abilities | Elemental Stats | Drops | Location |
|---|---|---|---|---|---|---|---|---|
|
Worker-Bot | 95 | 2000 | Melee | - | ✤ Def | - | The Warehouse |
|
Red Energy Key | 25 | 10 | None | - | - | Red Energy Key |
The Warehouse |
|
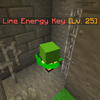
Lime Energy Key | 25 | 10 | None | - | - | Lime Energy Key |
The Warehouse |
Red Room
The Red Room is unlocked at the Red Door using the Red Energy Key. Several Energy Turrets will pelt at you when you enter, with a Tier 2 [✫✫✫✫] Loot Chest being found in the middle of this room. Following this is a partly scaffolded area, which then leads to the start of the control room.
| Image | Name | Level | Health | AI Type | Abilities | Elemental Stats | Drops | Location |
|---|---|---|---|---|---|---|---|---|
|
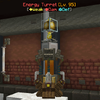
Energy Turret | 95 | 7000 | Ranged | - | ✦ Weak ✹ Dam ✽ Def |
- | The Warehouse |

|
Worker-Bot | 95 | 2000 | Melee | - | ✤ Def | - | The Warehouse |

|
Guardian-Bot | 95 | 12000 | Burst Ranged | - | ✤ Weak ✹ Dam |
- | The Warehouse |
Lime Room
The Lime Room is unlocked at the Lime Door using the Lime Energy Key. It is a parkour section that then requires you to explore to find a Cyan Energy Key, founded by doing the rest of the parkour near the door. There is also an optional Tier 2 [✫✫✫✫] Loot Chest that can be found by fully completing the parkour. Opening the Cyan Door will lead to the start of the control room.
| Image | Name | Level | Health | AI Type | Abilities | Elemental Stats | Drops | Location |
|---|---|---|---|---|---|---|---|---|
|
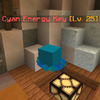
Cyan Energy Key | 25 | 10 | None | - | - | Cyan Energy Key |
The Warehouse |
Control Room
At the start of the third room is an exit and a Tier 3 [✫✫✫✫] Loot Chest that requires 2 nearby mobs to be killed. If you don't take the exit and continue, you will be brought to a room that has three differently-colored Control Panels. All three of them must be killed to open the door. Several Energised Mechs will spawn from machines that line the walls opposite of the Control Panels. Once all Control Panels have been destroyed, the door is opened to the next room.
| Image | Name | Level | Health | AI Type | Abilities | Elemental Stats | Drops | Location |
|---|---|---|---|---|---|---|---|---|
| File:ControlPanel(Orange).png File:ControlPanel(Green).png File:ControlPanel(Blue).png |
Control Panel | 95 | 24000 | None | - | ✦ Weak | - | The Warehouse |

|
Energised Mech | 95 | 9000 | Melee | - | ✽ Weak ✦ Def |
- | The Warehouse |
Warehouse Exit
This room starts off with a Tier 2 [✫✫✫✫] Loot Chest. Continuing on will lead to a three-way split. The path to the left leads to a Tier 1 [✫✫✫✫] Loot Chest, continuing straight will lead to a side section with a Tier 3 [✫✫✫✫] Loot Chest that requires a Purple Energy Key to open. The key is found by doing the parkour in the room on the right. A Tier 1 [✫✫✫✫] Loot Chest can be found by continuing on the parkour to the left from the key. To get back to the chest, there will be a ladder available to send you to the start of the parkour and on to the path of the chest. There are stairs opposite to the wall of the room with the purple key chest that lead to a Tier 1 [✫✫✫✫] Loot Chest. Continuing on the main path is a tight hallway with several Guardian-Bots within. A final crossroads is encountered, taking a hidden path to the right around some boxes will lead to a Tier 1 [✫✫✫✫] Loot Chest, while the center and left chests lead to the exit of the cave, having a Tier 3 [✫✫✫✫] Loot Chest found within that requires 4 nearby mobs to be killed to open it.
| Image | Name | Level | Health | AI Type | Abilities | Elemental Stats | Drops | Location |
|---|---|---|---|---|---|---|---|---|

|
Worker-Bot | 95 | 2000 | Melee | - | ✤ Def | - | The Warehouse |

|
Energised Mech | 95 | 9000 | Melee | - | ✽ Weak ✦ Def |
- | The Warehouse |
|
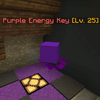
Purple Energy Key | 25 | 10 | None | - | - | Purple Energy Key |
The Warehouse |

|
Guardian-Bot | 95 | 12000 | Burst Ranged | - | ✤ Weak ✹ Dam |
- | The Warehouse |
