The Corkus Traversal
| The Corkus Traversal | |
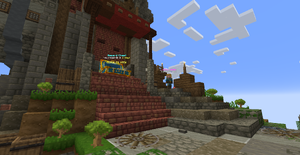 The base camp for this lootrun. | |
| Access | |
|---|---|
| Suggested Level | 90 |
| Lootrun Chief Location |
X: -1555, Y: 97, Z: -2668 |
| Required Quests | The Envoy Part I The Envoy Part II |
| Required Caves | Builder-Bot Central Corkus Quarry The Warehouse Avos Animation Totem Junk Pit Pirate Lattice Aquaculture Aquifer Steamworks |
| Lootrun Info | |
| Min. Challenges | 4 |
| Total Starting Challenges |
10 |
| Starting Timer | 5:00 |
| Mob Scaling (per Challenge) |
+60% Health +20% Damage |
| Mobs | See List of Mobs |
The Corkus Traversal is a Lootrun based in Corkus. The camp is east of Fallen Factory, and requires most caves in Corkus and the Envoy questline to be complete. Not counting the Spelunk challenges, there are eleven challenges in total.
All of the mobs' HP is their base HP, and it will increase further in the lootrun.
Avos Territory Challenges
Spelunk - Aquaculture Aquifer
In this cave underneath the Avos Territory at -1930, 83, -3325, there is only one Tier 4 [✫✫✫✫] Loot Chest. The chest requires a Plague Bot-1346 to be killed.
| Image | Name | Level | Health | AI Type | Abilities | Elemental Stats | Drops | Location |
|---|---|---|---|---|---|---|---|---|
|
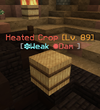
Heated Crop | 89 | 1000 | Melee | Flamethrower | ✹ Dam ✽ Weak |
- | Aquaculture Aquifer |

|
F-B 150 Parasite Exterminator |
92 | 5000 | Melee (Flying) |
- | ✽✤ Def | - | Aquaculture Aquifer |
|
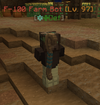
F-100 Farm Bot | 97 | 10000 | Melee | Heavy Charge Multihit |
✽✤ Def | - | Aquaculture Aquifer |

|
Crow Scarer 5000 | 97 | 11000 | Burst Ranged | - | ✤ Dam ❋✤ Def ✹ Weak |
- | Aquaculture Aquifer |
|
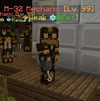
M-32 Mechanic | 99 | 4500 | Ranged | - | ✽✤ Def ✦ Weak |
- | Aquaculture Aquifer |

|
P-100 Parasite | 98 | 8000 | Charge (Flying) |
- | ✹✦ Dam | - | Aquaculture Aquifer |

|
Plague Bot-1346 | 100 | 100000 | Melee | Blindness Immune Knockback Immune Slowness Immune Push Arrow Storm Charge Heavy Charge |
✹✦ Dam ✹✤ Def ✽ Weak |
- | Aquaculture Aquifer |
Destroy - Shackles of the Past
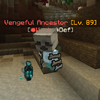
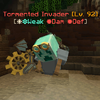
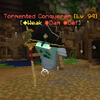
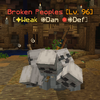
The Shackles of the Past is a Destroy objective, involving a large totem anchoring the souls of dead Avos and Corkians alike, preventing them from passing on. The totem has ? base HP, but doesn't move nor retailiate.
| Image | Name | Level | Health | AI Type | Abilities | Elemental Stats | Drops | Location |
|---|---|---|---|---|---|---|---|---|
|
Vengeful Ancestor | 89 | ? | Melee | ? | ✹ Weak ❋ Def |
- | The Corkus Traversal Destroy Challenge (Avos Outskirts) |
|
Tormented Invader | 94 | ? | Ranged | Arrow Storm | ❋✽ Weak ✹ Dam ✹ Def |
- | The Corkus Traversal Destroy Challenge (Avos Outskirts) |
|
Tormented Conqueror | 95 | ? | Berserk | ? | ✦ Weak ✹ Dam ✹ Def |
- | The Corkus Traversal Destroy Challenge (Avos Outskirts) |
|
Broken Peoples | 95 | ? | Melee | Self-Destruct | ✦ Weak ❋ Dam ✹❋ Def |
- | The Corkus Traversal Destroy Challenge (Avos Outskirts) |
Slay Mobs - Fanatic Nest
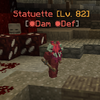
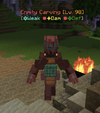
The Fanatic Nest is a Slay Mobs objective located in Avos Territory, requiring you to slay 4 waves of mobs. If you are camping in a high-altitude safespot, Bronze Avia Bots will spawn. Two extra Radical Avos also spawn high in the cave early in the challenge, but they do not need to be slain and will disappear after clearing the second wave. The mobs that are spawned per wave are as follows:
- Wave 1:
- 5 Fanatic Carvers
- 1 Enmity Carving
- Wave 2:
- 2 Fanatic Carvers
- 2 Radical Avos
- 1 Enmity Carving
- Wave 3:
- 3 Fanatic Carvers
- 2 Radical Avos
- 3 Enmity Carvings
- Wave 4:
- 7 Statuettes
| Image | Name | Level | Health | AI Type | Abilities | Elemental Stats | Drops | Location |
|---|---|---|---|---|---|---|---|---|
|
Statuette | 82 | 5,400 | Melee | Knockback Immune | ✹ Dam ✹ Def |
- | The Corkus Traversal: Fanatic Nest, from Enmity Carvings |

|
Radical Avos | 93 | 12,100 | Ranged (Flying) |
Knockback Immune Arrow Storm |
❋ Dam ❋ Def |
- | The Corkus Traversal: Fanatic Nest |

|
Fanatic Carver | 95 | 7,780 | Melee | - | ✤ Dam ✤ Def |
- | The Corkus Traversal: Fanatic Nest |
|
Enmity Carving | 98 | 28,100 | Crawl | Knockback Immune Heavy Pull Heavy Arrow Storm |
✽ Weak ✹✦ Dam ✹✤ Def |
8 Statuettes | The Corkus Traversal: Fanatic Nest |

|
Bronze Avia Bot | 85 | 2,200 | Ranged (Flying) |
Heavy Pull | ✹❋✽✤✦ Dam | - | The Corkus Traversal: Pirate Toll, Fanatic Nest |
Corkus Plateaus Challenges
Spelunk - Builder-Bot Central
In this cave just north of Corkus City at -1674, 52, -3060, there are 2 Tier 3 [✫✫✫✫] Loot Chests and a Tier 4 [✫✫✫✫] Loot Chest. A Tier 3 chest is found at -1605, 38, -3077 that requires a Crazed Machinist to be killed. Another Tier 3 chest is found at -1616, 37, -3109 that requires an Orinthopter to be killed. A Tier 4 chest is found in a small chamber that has the exit that is opened after an Architect-430 is killed, which is also the mob that must be killed to open this chest.
| Image | Name | Level | Health | AI Type | Abilities | Elemental Stats | Drops | Location |
|---|---|---|---|---|---|---|---|---|
|
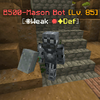
B500-Mason Bot | 85 | 7500 | Jumper | - | ✹✦ Def ❋ Weak |
- | Builder-Bot Central |
|
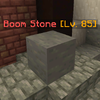
Boom Stone | 85 | 2000 | Melee | Self-Destruct | - | - | Builder-Bot Central |
|
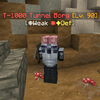
T-1000 Tunnel Borg | 90 | 5000 | Charge | - | ✹✦ Def ❋ Weak |
- | Builder-Bot Central |
|
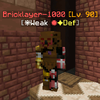
Bricklayer-1000 | 90 | 4000 | Ranged | - | ✹✦ Def ❋ Weak |
- | Builder-Bot Central |

|
Crazed Machinist | 100 | 12000 | Burst Ranged | Heavy Charge Meteor |
✹✦ Def ❋ Weak |
- | Builder-Bot Central |
|
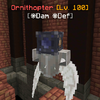
Ornithopter | 100 | 20000 | Melee (Flying) |
Knockback Immune Multihit |
❋ Dam ❋ Def |
- | Builder-Bot Central |
|
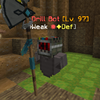
1900-Drill Bot | 97 | 10000 | Melee | - | ✹✦ Def ❋ Weak |
- | Builder-Bot Central |
|
Architect-430 | 100 | 120000 | Melee | Blindness Resist Knockback Resist Slowness Resist Charge Arrow Storm Heavy Flamethrower |
- | - | Builder-Bot Central |
Spelunk - Corkus Quarry
In this cave on the eastern edge of Corkus, there are two Tier 3 [✫✫✫✫] Loot Chests and a Tier 4 [✫✫✫✫] Loot Chest. A Tier 3 chest is found in an opening at -1430, 45, -2715 that requires 11 nearby mobs to be killed. Another Tier 3 chest is found at -1382, 23, -2737 that requies 6 nearby mobs to be killed. A Tier 4 chest is found near the end at -1405, 8, -2745 that requires a L.A.Z.E.R. Driller to be killed.
| Image | Name | Level | Health | AI Type | Abilities | Elemental Stats | Drops | Location |
|---|---|---|---|---|---|---|---|---|
|
Derelict Mine-Bot | 95 | 15000 | Melee | - | ✦ Dam ✽ Weak |
- | Corkus Quarry |

|
Derelict Boom-Bot | 95 | 10000 | Ranged | Explode | ✽ Weak | - | Corkus Quarry |
|
R-105 Repair Bot | 100 | 20000 | Melee | Charge | ❋ Dam ❋ Def |
- | Corkus Quarry |
|
L.A.Z.E.R. Driller | 100 | 65000 | Melee | Laser Drill | ✹ Dam ✹✦ Def ✽ Weak |
- | Corkus Quarry |
Slay Mobs - Brigands' Hideaway
Brigands' Hideaway is a Slay Mobs objective located at -1776, 58, -2705, requiring you to slay 4 waves of mobs. If you camp above the entrance to the cave, Brigand War Machines will spawn. The mobs that are spawned per wave are as follows:
- Wave 1:
- 4 Brigand Cutthroats
- 3 Brigand Fuseliers
- Wave 2:
- 8 Brigand Cutthroats
- 1 Disguised Bot
- Wave 3:
- 6 Brigand Cutthroats
- 3 Brigand Fuseliers
- 2 Disguised Bots
- Wave 4:
- 8 Brigand Cutthroats
- 4 Brigand Fuseliers
- 3 Disguised Bots
| Image | Name | Level | Health | AI Type | Abilities | Elemental Stats | Drops | Location |
|---|---|---|---|---|---|---|---|---|
|
Brigand Cutthroat | 89 | 9,600 | Melee | - | ✦ Def | - | The Corkus Traversal: Brigands' Hideaway |
|
Brigand Fuselier | 89 | 6,400 | Ranged | - | ✦ Weak ✽ Def |
- | The Corkus Traversal: Brigands' Hideaway |

|
Disguised Bot | 91 | 20,500 | Melee | Blindness Immune Vanish Multihit |
✤ Weak ❋ Dam ❋✦ Def |
- | The Corkus Traversal: Brigands' Hideaway |
|
Brigand War Machine | 95 | 80,000 | Melee | Blindness Immune Slowness Immune |
✦ Weak ✤ Dam |
- | The Corkus Traversal: Brigands' Hideaway |
Slay Target - Cable Coolers
Cable Coolers is a Slay Target objective found at -1446, 45, -3165, requiring you to slay the Cooling Unit, which then becomes the Overheated Unit. The following waves of mobs spawn:
- Wave 1:
- 5 Cable Managers
- 2 Cable Serpents
- Wave 2:
- 8 Cable Managers
- Cooling Unit
- Becomes: Overheated Unit
- Wave 3:
- 4 Cable Serpents
- 2 Cable Hydras
- Wave 4:
- 4 Cable Managers
- 3 Cable Serpents
- 1 Cable Hydra
- Wave 5:
- 6 Cable Managers
- 1 Cable Serpent
- 1 Cable Hydra
- Wave 6:
- 2 Cable Serpents
- 2 Cable Hydras
| Image | Name | Level | Health | AI Type | Abilities | Elemental Stats | Drops | Location |
|---|---|---|---|---|---|---|---|---|

|
Cable Manager | 90 | ? | Melee | - | ✦ Dam ✤✦ Def |
- | The Corkus Traversal Slay Target Challenge (Cable Coolers) |
|
Cable Serpent | 92 | ? | Charge | Knockback Immune | ✹ Weak ✦ Dam ✦ Def |
- | The Corkus Traversal Slay Target Challenge (Cable Coolers) |
|
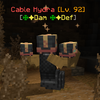
Cable Hydra | 92 | ? | Crawl | Knockback Immune | ✤✦ Dam ✤✦ Def |
- | The Corkus Traversal Slay Target Challenge (Cable Coolers) |
|
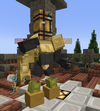
Cooling Unit | 95 | ? | Burst Ranged | Blindness Resist Knockback Immune Slowness Resist Multihit Charge Wave |
✤✦ Weak ✽ Dam ✹✽ Def |
Overheated Unit | The Corkus Traversal Slay Target Challenge (Cable Coolers) |
|
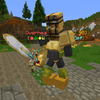
Overheated Unit | 95 | ? | Burst Ranged | Blindness Immune Knockback Immune ? |
✹✤✦ Weak ✹ Dam ✽ Def |
- | The Corkus Traversal Slay Target Challenge (Cable Coolers) |
Destroy - Wireless Commander
Wireless Commander is a Destroy objective, involving the Communication Monopole. The Communication Monopole has 350000 base HP, but has no attacks. The Monopole is at -1569, 28, -3141.
| Image | Name | Level | Health | AI Type | Abilities | Elemental Stats | Drops | Location |
|---|---|---|---|---|---|---|---|---|

|
Cable Manager | 90 | ? | Melee | - | ✦ Dam ✤✦ Def |
- | The Corkus Traversal Destroy Challenge (Wireless Commander) |

|
Cable Serpent | 92 | ? | Charge | Knockback Immune | ✹ Weak ✦ Dam ✦ Def |
- | The Corkus Traversal Destroy Challenge (Wireless Commander) |

|
Cable Hydra | 92 | ? | Crawl | Knockback Immune | ✤✦ Dam ✤✦ Def |
- | The Corkus Traversal Destroy Challenge (Wireless Commander) |
|
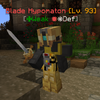
Blade Hypomaton | 93 | ? | Melee | Blindness Resist Knockback Immune Slowness Resist Multihit |
✤ Weak ✹❋ Def |
- | The Corkus Traversal Destroy Challenge (Wireless Commander) |
Defend - Fruit Crate
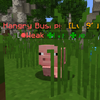
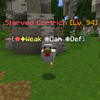
Fruit Crate is a defend objective located at -1759, 72, -2768, requiring you to defend the Fruit Crate, which has ? base HP and must be defended for 50 seconds. Hangry Bushpigs and Starved Cortriches will prioritize the crate, although they can attack you instead.
| Image | Name | Level | Health | AI Type | Abilities | Elemental Stats | Drops | Location |
|---|---|---|---|---|---|---|---|---|
|
Hangry Bushpig | 90 | ? | ? | Heavy Charge | ✤ Dam ✤ Def ✹ Weak |
- | The Corkus Traversal Defend Challenge (Fruit Crate) |
|
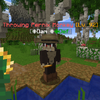
Throwing Pernix Monkey | 92 | ? | Rapid Ranged | ? | ❋ Dam ❋✤ Def |
- | The Corkus Traversal Defend Challenge (Fruit Crate) |
|
Starved Cortrich | 94 | ? | Jumper | ? | ❋ Dam ❋ Def ✹✦ Weak |
- | The Corkus Traversal Defend Challenge (Fruit Crate) |
Scrapyards Challenges
Spelunk - Junk Pit
In this cave located at -1782, 64, -2569, there are three Tier 3 [✫✫✫✫] Loot Chests found within that each require 8 nearby mobs to be killed. The three chests are found at:
- -1685, 13, -2565
- -1761, 15, -2628
- -1715, 12, -2639
| Image | Name | Level | Health | AI Type | Abilities | Elemental Stats | Drops | Location |
|---|---|---|---|---|---|---|---|---|
|
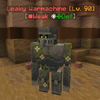
Leaky Warmachine | 90 | 20000 | Burst Ranged | - | ❋✤ Def ✹ Weak |
- | Junk Pit |
|
Overclocked Bot | 90 | 10200 | Jumper | - | ❋✤ Def ✹ Weak |
- | Junk Pit |
|
Blink Bot | 93 | 5000 | Melee | Vanish Teleport Explode |
❋✤ Def ✹ Weak |
- | Junk Pit |
Spelunk - The Warehouse
In this cave found by the coast in the Scrapyards at -1847, 41, -2641, there are three Tier 3 [✫✫✫✫] Loot Chests found within. The Warehouse is one of the most complex caves in this lootrun, with there being several different sections. It does not matter if you choose to do the path with the Red or Lime energy key, as they both lead to the same Tier 3 chest at -1741, 22, -2720, requiring 2 nearby mobs to be killed. Another Tier 3 chest is found at -1740, 18, -2812, requiring a Purple Energy Key to be given to the chest to open it. A final Tier 3 chest is found at the end at -1755, 23, -2822, requiring 4 nearby mobs to be killed.
| Image | Name | Level | Health | AI Type | Abilities | Elemental Stats | Drops | Location |
|---|---|---|---|---|---|---|---|---|
|
Guardian-Bot | 95 | 12000 | Burst Ranged | - | ✹ Dam ✤ Weak |
- | The Warehouse |
|
Worker-Bot | 95 | 2000 | Melee | - | ✤ Def | - | The Warehouse |
|
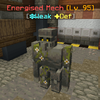
Energised Mech | 95 | 9000 | Melee | - | ✦ Def ✽ Weak |
- | The Warehouse |
|
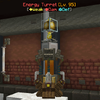
Energy Turret | 95 | 7000 | Ranged | - | ✹ Dam ✽ Def ✦ Weak |
- | The Warehouse |
| File:ControlPanel(Orange).png File:ControlPanel(Green).png File:ControlPanel(Blue).png |
Control Panel | 95 | 24000 | None | - | ✦ Weak | - | The Warehouse |
|
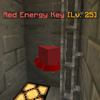
Red Energy Key | 25 | 10 | None | - | - | Red Energy Key |
The Warehouse |
|
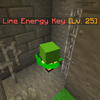
Lime Energy Key | 25 | 10 | None | - | - | Lime Energy Key |
The Warehouse |
|
Cyan Energy Key | 25 | 10 | None | - | - | Cyan Energy Key |
The Warehouse |
|
Purple Energy Key | 25 | 10 | None | - | - | Purple Energy Key |
The Warehouse |
Spelunk - Avos Animation Totem
In this cave hidden below the Scrapyards at -1759, 37, -2450, there is a Tier 3 [✫✫✫✫] Loot Chest and two Tier 4 [✫✫✫✫] Loot Chests. They all have the same requirement for opening and accessing them - defeating the Avos Animation Totem.
| Image | Name | Level | Health | AI Type | Abilities | Elemental Stats | Drops | Location |
|---|---|---|---|---|---|---|---|---|
|
Avos Animation Totem | 98 | 170000 | Melee | Searing Beam Backstep Thrown Bomb Lunge Spin Lunge Punch Wind Thrust Groundslam |
- | - | Avos Animation Totem (Cave) |
Defend - Sanitizing Robots
Sanitizing Robots is a Defend objective found at -1757, 71, -2608, requiring you to defend the Armstice Sapling. The Sapling has ? base HP and must be defended for 50 seconds. Burning Men will prioritize the sapling, although they can still attack you, while the other mobs will attack you instead.
| Image | Name | Level | Health | AI Type | Abilities | Elemental Stats | Drops | Location |
|---|---|---|---|---|---|---|---|---|
|
Burning Man | 91 | ? | Melee | - | ✹ Weak ✹ Dam ✽ Def |
- | The Corkus Traversal Protect Challenge (Sanitizing Robots) |
|
Molten Scrap Heap | 91 | ? | Crawl | Blindness Immune Knockback Immune Self-Destruct |
✽ Weak ✹✦ Dam |
- | The Corkus Traversal Protect Challenge (Sanitizing Robots) |

|
Blazing Bot | 93 | ? | Rapid Ranged | - | ✽ Weak ✹ Dam ✹ Def |
- | The Corkus Traversal Protect Challenge (Sanitizing Robots) |

|
Streetcleaner | 95 | ? | Charge | Slowness Immune Heavy Flamethrower Heavy Multihit |
✽ Weak ✹❋ Dam ❋ Def |
- | The Corkus Traversal Protect Challenge (Sanitizing Robots) |
Relos Plateaus Challenges
Spelunk - Pirate Lattice
In this cave found at -1394, 66, -2393, there are three Tier 3 [✫✫✫✫] Loot Chests. A Tier 3 chest is found at the end of the alternate path at -1446, 36, -2336 that requires 1 nearby mob to be killed. Another Tier 3 chest is found at an edge of the square block grid parkour at -1455, 36, -2312 that requires 2 nearby mobs to be killed. Another Tier 3 chest is found at the end of a later alternate path at -1378, 36, -2301 that requires 1 nearby mob to be killed. A final Tier 3 chest is found at -1390, 36, -2279 that requires 2 nearby mobs to be killed.
| Image | Name | Level | Health | AI Type | Abilities | Elemental Stats | Drops | Location |
|---|---|---|---|---|---|---|---|---|
|
Tamed Wolf | 85 | 4500 | Melee | - | - | - | Pirate Lattice |
|
Pirate Bot-9001 | 87 | 10900 | Melee (Flying) |
Knockback Immune Explode |
✽ Dam ✽ Def ✦ Weak |
- | Pirate Lattice |

|
Pirate Guard | 89 | 83000 | Charge | Multihit | ✽ Def | - | Pirate Lattice |
|
Cyborg Picaroon | 90 | 19400 | Rapid Ranged | Wave | ✽ Def ✦ Weak |
- | Pirate Lattice |
Spelunk - Steamworks
In this cave found at [-1471, 63, -2376], there is a Tier 3 [✫✫✫✫] Loot Chest and a Tier 4 [✫✫✫✫] Loot Chest. The Tier 3 chest found at -1429, 38, -2397 requires 6 nearby mobs to be killed. The Tier 4 chest found at -1436, 2, -2365 requires the Fission Guardian to be killed.
| Image | Name | Level | Health | AI Type | Abilities | Elemental Stats | Drops | Location |
|---|---|---|---|---|---|---|---|---|
|
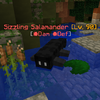
Sizzling Salamander | 90 | 6950 | Melee | Charge | ✹ Dam ✹ Def |
- | Steamworks |
|
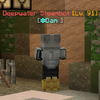
Deepwater Steambot | 91 | 7200 | Melee | Flamethrower Wave |
✽ Dam | - | Steamworks |
|
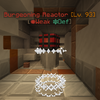
Burgeoning Reactor | 93 | 5600 | None | Explode | ✽ Def ✹ Weak |
- | Steamworks |
|
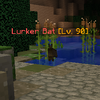
Lurker Bat | 90 | 6850 | Melee | - | - | - | Steamworks |
|
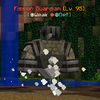
Fission Guardian | 95 | 35550 | Melee | Flamethrower Wave Charge Heavy Explode |
✹✽ Def ❋ Weak |
Steam Reactor |
Steamworks |
Slay Mobs - Relos Underpass
The Relos Underpass is a Slay Mobs objective located at -1739, 62, -2451, requiring you to slay 4 waves of mobs. The mobs that are spawned per wave are as follows:
- Wave 1:
- 3 Battle Drones
- 1 Pendant Tesla (Unnecessary to kill)
- 2 Collection Rovers
- Wave 2:
- 2 Battle Drones
- 1 Pendant Tesla (Unnecessary to kill)
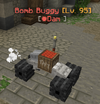
- 3 Bomb Buggies
- Wave 3:
- 3 Battle Drones
- 1 Collection Rover
- 2 Bomb Buggies
- Wave 4:
- 2 Collection Rovers
- 3 Bomb Buggies
| Image | Name | Level | Health | AI Type | Abilities | Elemental Stats | Drops | Location |
|---|---|---|---|---|---|---|---|---|
|
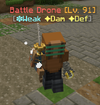
Battle Drone | 91 | 5,650 | Melee | Multihit | ✽ Weak ✦ Dam ✦ Def |
- | The Corkus Traversal: Relos Underpass |
|
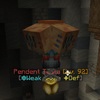
Pendent Tesla | 92 | 12,500 | Burst Ranged (Stationary) |
Knockback Immune Heavy Flamethrower |
✽ Weak ✦ Dam ✦ Def |
- | The Corkus Traversal: Relos Underpass |
|
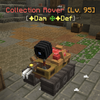
Collection Rover | 95 | 8,800 | Charge | Knockback Resist Heal |
✦ Dam ✤✦ Def |
- | The Corkus Traversal: Relos Underpass |
|
Bomb Buggy | 95 | 7,200 | Charge | Explode | ✹ Dam | - | The Corkus Traversal: Relos Underpass |
Slay Target - Robot Pirates
Robot Pirates is a Slay Target objective located at -1439, 67, -2437, requiring you to slay the Commodroid. The following waves of mobs spawn:
- Wave 1:
- 5 Scallywag Droids
- Wave 2:
- 4 Scallywag Droids
- Commodroid
- Wave 3:
- 4 Scallywag Droids
- Wave 4:
- 5 Scallywag Droids
| Image | Name | Level | Health | AI Type | Abilities | Elemental Stats | Drops | Location |
|---|---|---|---|---|---|---|---|---|

|
Scallywag Droid | 91 | ? | Charge | - | ✽ Dam ✽ Def |
- | The Corkus Traversal Slay Target Challenge (Robot Pirates) |
|
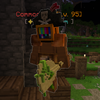
Commodroid | 95 | ? | Melee | Blindness Resist Slowness Immune Multihit Heavy Charge Wave |
✦ Weak ✽ Dam |
- | The Corkus Traversal Slay Target Challenge (Robot Pirates) |
Slay Target - Fort Corkia
Fort Corkia is a Slay Target objective located at -1309, 102, -2258, requiring the Fort Corkia Leader to be slain. The following waves of mobs spawn:
- Wave 1:
- 4 Fort Corkia Swordsmen
- 3 Fort Corkia Gunsmen
- Wave 2:
- 5 Fort Corkia Swordsmen
- Fort Corkia Leader
- Wave 3:
- 3 Fort Corkia Gunsmen
- Wave 4:
- 6 Fort Corkia Swordsmen
| Image | Name | Level | Health | AI Type | Abilities | Elemental Stats | Drops | Location |
|---|---|---|---|---|---|---|---|---|
|
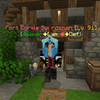
Fort Corkia Swordsman | 91 | ? | Melee | ? | ✦ Dam ✹✦ Def ✤ Weak |
- | The Corkus Traversal Slay Target Challenge (Fort Corkia) |
|
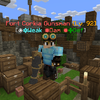
Fort Corkia Gunsman | 92 | ? | Burst Ranged | ? | ✹ Dam ✹✤ Def ❋✽ Weak |
- | The Corkus Traversal Slay Target Challenge (Fort Corkia) |
| File:FortCorkiaLeader.png | Fort Corkia Leader | 95 | ? | ? | ? | ✤ Dam ✹✤ Def |
- | The Corkus Traversal Slay Target Challenge (Fort Corkia) |
