| Image
|
Name
|
Level
|
Health
|
AI Type
|
Abilities
|
Elemental Stats
|
Drops
|
Location
|
|
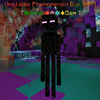
Unstable Phenomenon
|
107
|
35000
|
Melee
|
Tp
Explode
Charge
Pull
|
Earth: Weakness
Fire: Damage
Air: Damage
Water: Damage
Thunder: Damage
|
-
|
Eldritch Outlook
|
|
Maelstrom Clinger
|
106
|
100000
|
Ranged
|
Arrow Storm
|
Fire: Damage
Water: Damage
Thunder: Damage
|
-
|
Eldritch Outlook
|
|
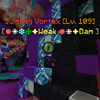
Swirling Vortex
|
109
|
35500
|
Ranged
|
Explode
Pull
Self-Destruct
|
Fire: Weakness, Damage
Air: Weakness, Damage
Water: Weakness
Earth: Weakness
Thunder: Weakness, Damage
|
-
|
Eldritch Outlook
|
Room 5
The player will find themselves at the bottom of a spiral staircase. Travelling upwards to bring them once again to the outside of the Eldritch Outlook, standing on another balcony with pillars and looking out to the Silent Expanse. Enter the door at the back to go back into the building.
Room 6
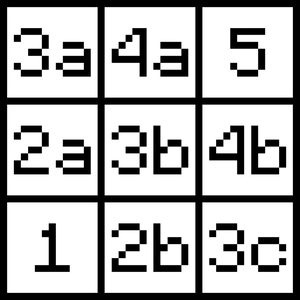
There are 9 rooms in this section, and the player will spawn in Room 1. The goal is to get to Room 5, the final room in the challenge. In each room, you must kill the main enemy, Reversion Catalyst, and turn in the token it drops to advance to an adjacent room, always moving upwards or rightwards towards Room 5.
It is advisable to take a route that avoids Room 4b, as the Reversion Catalyst in that room has high regeneration.
| Image
|
Name
|
Level
|
Health
|
AI Type
|
Abilities
|
Elemental Stats
|
Drops
|
Location
|
|
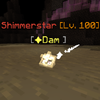
Shimmerstar
(Melee AI)
|
100
|
18000
|
Melee AI
|
-
|
Dam
|
-
|
Eldritch Outlook
|
| File:Shimmerstar(ChargeAI).png
|
Shimmerstar
(Charge AI)
|
100
|
18000
|
Charge AI
|
-
|
Dam
|
-
|
Eldritch Outlook
|
|
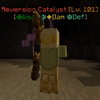
Reversion Catalyst
(Room 1)
|
101
|
180000
|
Support AI
|
Heavy Weakness
Push
Heavy Heal
Charge
|
Weak
Dam
Def
|
Eldritch Outlook Token
|
Eldritch Outlook
|
| Image
|
Name
|
Level
|
Health
|
AI Type
|
Abilities
|
Elemental Stats
|
Drops
|
Location
|
|
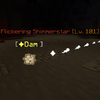
Flickering Shimmerstar
(Melee AI, Room 2a)
|
101
|
6675
|
Melee AI
|
-
|
Dam
|
Scalecore
(Crawl AI, Room B)
|
Eldritch Outlook
|
| File:FlickeringShimmerstar(ChargeAI,Room2a).png
|
Flickering Shimmerstar
(Charge AI, Room 2a)
|
101
|
6675
|
Charge AI
|
-
|
Dam
|
Scalecore
(Melee AI, Room B)
|
Eldritch Outlook
|
|
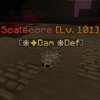
Scalecore
(Melee AI, Room 2a)
|
101
|
28050
|
Melee AI
|
Weakness
|
Dam
Def
|
-
|
Flickering Shimmerstar
(Charge AI, Room 2a)
|
| File:Scalecore(CrawlAI,Room2a).png
|
Scalecore
(Crawl AI, Room 2a)
|
101
|
28050
|
Crawl AI
|
Slowness
|
Dam
Def
|
-
|
Flickering Shimmerstar
(Melee AI, Room 2a)
|
|
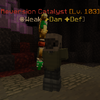
Reversion Catalyst
(Room 2a)
|
103
|
212500
|
Ranged AI
|
Charge
Teleport
Heavy Vanish
Arrow Storm
|
Weak
Dam
Def
|
Eldritch Outlook Token
|
Eldritch Outlook
|
Room 7
The player once again placed on a balcony overlooking the Eldritch Outlook. Walking into the doorway to the player's left will transfer them to the next room.
Room 8
The player is placed in a room with parkour. The blocks that the player must jump on are invisible, while the glowstone on the floor far down below projects where the invisible platforms are in the air, as they are directly above the glowstone. At the end of each parkour set, there will be an entrance that will transport the player to the next parkour course. Going through the third entrance brings the player out of the parkour room. One strategy is to look directly down as to visualize the invisible blocks with the glowstone.
Room 9
Once more the player is placed onto an area overlooking the Eldritch Outlook. Simply walk forwards and click the button to advance to the boss room.
Boss Room
The final boss at the very top of the Eldritch Outlook is The Eye, which is considered by many to be a boss requiring skill.
Dungeon Merchant
The Dungeon Merchant in front of the Eldritch Outlook sells:
Trivia
- The boss arena where The Eye is fought becomes more reddened as the battle progresses.
- In the bossroom it is possible to find remnants of big stone structures


.png)
.png)


.png)


.png)
.png)
.png)
.png)
.png)
.png)
.png)
.png)
.png)
.png)
.png)
.png)
.png)
.png)
.png)
.png)
.png)
.png)
.png)
.png)
.png)
.png)
.png)
.png)
.png)
.png)
.png)
.png)
.png)
.png)
.png)