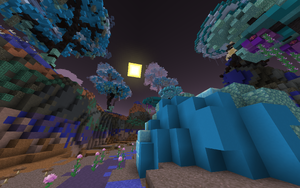
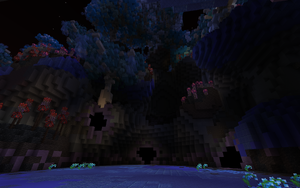
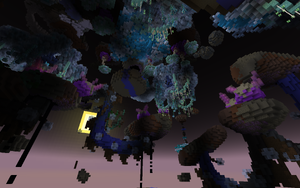
The Nameless Anomaly (Raid)
| The Nameless Anomaly | |
| |
| Discovery Lore | |
|---|---|
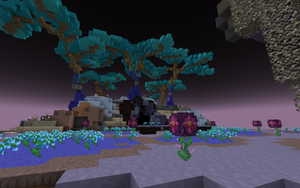
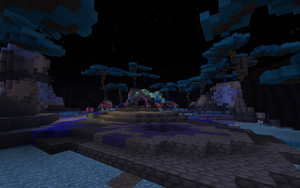
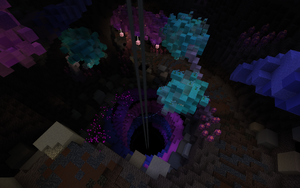
| This recluse gap in reality has laid unknown to all but a few for an immeasurable amount of time. Within its walls lies a colossal hole in the barrier between realms, and within that hole lies a metaphysical entity responsible for the creation of the Void Holes that scatter the Silent Expanse. | |
| Access | |
| Coordinates | X: 1088, Z: -824 |
| Minimum Level | 103 |
| Suggested Level | 105 |
| Max Party Level | 500 |
| Quest Required | A Journey Further |
| Runes Required | 5 Tol Runes |
| Players Required | 4 |
| Raid | |
| Monsters | List of mobs |
| Boss | The #̴͈̌́͑͝#̷̭͔̻̔̊͊͂͜#̸̪̖͍̪͐̊̋͒#̶̫̫̜̑͠#̴̛̱͈̘͆̋͝ Anomaly (Lv. 300) |
| Rewards | Charm of The Void, Emeralds, Mastery Tomes, Broken Corrupted Dungeon Keys, various Crafting Materials |
| This article is about the raid. For the boss of the raid, see The Nameless Anomaly (Boss). |
The Nameless Anomaly is currently the highest-level Raid in Wynncraft. It was revealed in the Wynncraft 2.0 Update Trailer.
Like other Raids, The Nameless Anomaly is a team-based challenge, requiring a party of at least 4 players to complete. As it is designed for endgame players level 105+, the total combat level of all party members is capped at 500. Since the maximum level a player can reach is 106, and there can only be 4 players, it technically has no level limit.
Preparing for the Raid
| Location |
| Void Valley 1115, -909 |
| Wynncraft Map |
To take on The Nameless Anomaly, you must first assemble a party of 4 players. Each must be at least level 103 and have completed A Journey Further.
The entrance to the Raid is at the border between the Toxic Wastes and Void Valley, near The Gateway to Nothing. The nearest town is Lutho, where players can restock on potions, runes, and repair crafted gear. There is also a Tol Altar fairly nearby to convert lesser runes into Tol Runes.
Once your party is prepared, travel to the entrance, and the party leader will have to give 5 Tol Runes to the Raid Keeper. Tol Runes can be obtained through converting Az Runes, Nii Runes or Uth Runes at a Tol Altar. Once the Runes have been given, your party will enter The Nameless Anomaly and be faced with your first Challenge Room.
The Nameless Anomaly uses two unique pieces of music, both of which introduce three new instruments: Bell, Guitar, and Flute.
| This page contains spoilers. Readers are discouraged from continuing if they want to discover features by themselves. |
This page contains spoilers. Readers are discouraged from continuing if they want to discover features by themselves.
Challenge Rooms
Progressing through The Nameless Anomaly involves defeating three randomly-selected Challenge Rooms in succession. Each of these rooms involves a variety of cooperative challenges, including puzzles, parkour, and combat, that your party must work together to complete. If you die during a challenge, you will be able to spectate the rest of your party while they continue, and you will be revived once the challenge is completed. Although the player count to enter the Nameless Anomaly is four, if three players die in any challenge, the raid will be lost. The only exception is the final boss, in which all four players must die for the raid to be lost.
After each Challenge Room, you will enter a small rest area where you can regroup and choose Power-Ups before proceeding to the next challenge. See the Power Ups section for details.
Room 1
Beyond Void
Destroy Room (Flooding Canyon)
The Flooding Canyon is a circular-shaped room dotted with many floating Malefic Void Rifts hovering in place midair. The Void Rifts have 100,000,000 HP, far too much for them to be dispatched quickly. Shortly after entering the room, a singular Berserker Berry will spawn on the small red platform. The Berry only has 1 HP, and the player that kills it will ingest it, granting them the strength to destroy the Malefic Void Rifts, but afflicting them with the Berry's poison.
The player that takes the Berserker Berry will have a list of effects applied to them:
- Blindness
- Heavy slowness
- Unable to cast any spells
- Melee/standard attack speed changed to "very slow"
- Very strong melee/standard attacks
The damage increase from the Berry is enough to allow that player to quickly destroy the Void Rifts. The other three players must guide the blinded player to the Void Rifts for them to destroy, and protect them from the other mobs coming out of the same Void Rifts. Note, the Berry player can attack and kill any mob in the room in one hit, except the Void rifts. However, the Berry player should exclusively target the Void Rifts and let their other party members kill the other mobs.
There is a small purple spot on the ground directly below each Malefic Void Rift, which the Berry player can use as an indicator to where the Void Rifts are.
To complete this challenge, the party must destroy all of the Malefic Void Rifts within two minutes. If not, the canyon will "flood with void" and the raid will be lost. Once all Void Rifts are destroyed, the players will be automatically teleported to the Power-Up room.
During this challenge, clusters of hostile mobs will periodically spawn from the Malefic Void Rifts, which can fall onto the Berry player. The longer the Void Rifts remain, the more mobs will come out of each one, keeping the amount of mobs spawning relatively stable even as the Void Rifts are eliminated.
These are the stats for the Berserker Berry and the Malefic Void Rifts:
| Image | Name | Level | Health | AI Type | Abilities | Elemental Stats | Drops | Location |
|---|---|---|---|---|---|---|---|---|

|
Berserker Berry | 500 | 1 | - | - | - | - | Flooding Canyon |
|
Malefic Void Rift | 125 | 100,000,000 | - | Knockback Immune Blindness Immune Slowness Immune The Endless Tides* |
- | - | Flooding Canyon |
- "The Endless Tides" is the spell that spawns clusters of mobs from the Malefic Void Rifts. Spawnable mobs are listed below:
| Image | Name | Level | Health | AI Type | Abilities | Elemental Stats | Drops | Location |
|---|---|---|---|---|---|---|---|---|
|
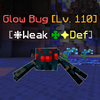
Glow Bug | 110 | 31,000 | Jumper AI | Blindness Immune Web |
Def Weak |
- | Flooding Canyon (Conjured by Malefic Void Rift) |
|
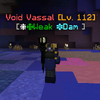
Void Vassal | 112 | 57,000 | Melee AI | ? | Dam Weak |
- | Flooding Canyon (Conjured by Malefic Void Rift) |

|
Azure Necromancer | 115 | 112,000 | RapidRanged AI | Heavy Wave | Dam Def |
- | Flooding Canyon (Conjured by Malefic Void Rift) |
|
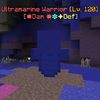
Ultramarine Warrior | 115 | 185,000 | Melee AI | Slowness Resist Knockback Immune |
Dam Def |
- | Flooding Canyon (Conjured by Malefic Void Rift) |

|
Abyssal Dukun | 115 | 150,000 | RapidRanged AI | Blindness Resist Slowness Resist Vanish Meteor |
Dam Def Weak |
- | Flooding Canyon (Conjured by Malefic Void Rift) |
Hold Room (Sunken Grotto)
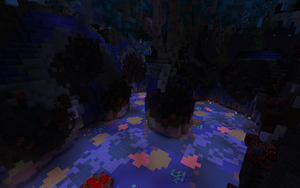
In the center of the Sunken Grotto is a large tree stump. On top of it is a purple plate. Players can reach the top of the tree stump by entering a Void Hole beneath it or simply jumping up to it. Only one player can be on top of the stump at a time, and if multiple players attempt to climb up, all players will be flung off the stump.
Standing on the purple plate will cause a one minute timer to begin ticking down. While the timer is going down, it will visually display in the center of every player's screen. Stepping off of the plate will pause the timer, however will not reset it. To complete this challenge, the plate's timer must reach 0. Once the timer reaches 0, a large boulder at the back of the Grotto will be removed, granting access to a large Void Hole. Once all four players are standing within the Void Hole, the players will be teleported to the Power-Up room. Any players killed in this room will be revived once the timer reaches 0, instead of when the players reach the power-up room.
While the timer is ticking down, small lasers will be telegraphed across the purple plate with gray particles, and be shot across shortly after, moderately damaging the player holding the plate if they are hit.
While the timer is ticking down, waves of mobs will periodically spawn on the ground around the tree stump. None of these mobs have to be killed however it is recommended to kill as many as possible.
When the timer has about 20s left, a single Monochromatism will spawn, a fast, butterfly-esque miniboss mob.
Once the timer reaches 50s, 30s, and 10s, a Void Hole will spawn, floating above the ground, at a random place within the arena. This Void Hole has 600,000 HP. If it is not destroyed within 10s of it spawning, the Heart of Darkness will spawn from it, a powerful miniboss. The timer cannot continue to tick down until the Heart of Darkness is killed.
Note: Two mobs called Ethereal Roots will spawn on the left and right of the center tree stump once the timer starts, and will periodically respawn. While these Roots are alive, they will boost the spawn rate of another mob in this room called the Reanimated Void Branch. Destroying the Ethereal Roots will lessen the spawn rate of the Void Branches, however will not stop them from spawning entirely.
Mobs that spawn in waves:
| Image | Name | Level | Health | AI Type | Abilities | Elemental Stats | Drops | Location |
|---|---|---|---|---|---|---|---|---|

|
Nocturnal Witness | 110 | 55,000 | Melee AI | Blindness Immune | Dam Def |
- | Sunken Grotto |
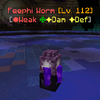
|
Feephi Worm | 113 | 50,000 | Charge AI | Blindness Resist Slowness Resist |
Dam Def Weak |
- | Sunken Grotto |
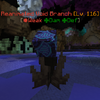
|
Reanimated Void Branch | 116 | 125,000 | Ranged AI | Knockback Resist Arrow Storm Heavy Charge |
Dam Def Weak |
- | Sunken Grotto |
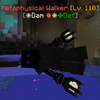
|
Metaphysical Walker | 118 | 350,000 | Melee AI | Knockback Immune Explode |
Dam Def |
- | Sunken Grotto |

|
Ethereal Root | 130 | 300,000 | - | - | Dam |
- | Sunken Grotto |
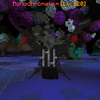
|
Monochromatism | 120 | 700,000 | Melee AI | Blindness Resist | - | - | Sunken Grotto |
These are the stats for the Void Holes and Heart of Darkness:
| Image | Name | Level | Health | AI Type | Abilities | Elemental Stats | Drops | Location |
|---|---|---|---|---|---|---|---|---|
|
Void Hole | 130 | 600,000 | - | Vile Emergence* | - | - | Sunken Grotto |
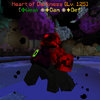
|
Heart of Darkness | 130 | 1,200,000 | ? | Throbbing Slam* Pull |
Dam Def Weak |
- | Sunken Grotto |
- "Vile Emergence" is the spell that summons the Heart of Darkness.
- Throbbing Slam is a ground pound ability that produces an Area of Effect puddle of toxic blood, harming players that stand in it.
Room 2
Dark Room (Nameless Cave)
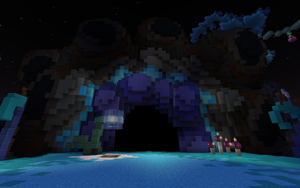
At the entrance to the Nameless Caves, a small, blue light will hover above the ground to the left of the cave entrance. The first player to step underneath of it will receive the light and become the "lightbearer". Once all four players step into the black entrance, the first room begins.
The player who received the light will have a sea lantern constantly hover above their head. During all three rooms in the Nameless Caves, the other three players must constantly stay close to the light player and within the light. Otherwise, the players not within the light will take constant, forced and heavy damage, being devoured by the invisible creatures that hide in the dark of the cavern. If any 3 players die, or if the light player dies, the raid will be lost. To complete this challenge, the players must make it through all three rooms in the Nameless Caves.
Because of a default Minecraft glitch not caused by WynnCraft, other players may sometimes become invisible to some players. If players cannot see the lightbearer in this room, they can attempt to follow and observe the light given off by the sea lantern itself. If the lightbearer has a WynnCraft disguise, putting the disguise on and taking it off will render them visible to all the other players for the rest of the Nameless Caves challenge. Putting on and taking off the disguise only needs to be done once at any point in this challenge to make a player visible to others.
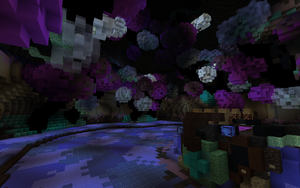
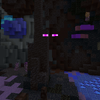
Room #1, Antechamber - Three Endermen, called "Shadowlings", hide within the dark in the cave. Every part of them is invisible, including their nametag, except for their purple eyes, which will glow in the dark. When the light player draws near a Shadowling, the Shadowling will become fully visible. Once all three Shadowlings are killed, an entrance will open up in the top-right corner of the cave. The exit leads outside of the cavern, however the players must still stay close to the light player, even in the natural light outside of the antechamber. Once the light player stands in the center of the Pale Shrine located just outside of the exit to the first room, everyone will be teleported to the next room five seconds later.
Room #2, Flowstone Chamber - A parkour made of flowstone pillars towers up through the room, and the party must simply make it through the parkour while staying close to the light player. On top of each pillar is a hostile, ranged mob called a Nullard, which should be killed or knocked off with ranged attacks several platforms before reaching it, as the Nullards deal considerable knockback. The Nullards only spawn once upon entering the room, and do not respawn once killed. Once the party reaches the end of the parkour, all four players must stand in the black exit of the room, including any dead/spectating players.
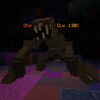
Room #3, Boss Chamber - A large and powerful boss called a Chiropterror will spawn in the center of the room, which must be killed while still staying close to the light player. The Chiropterror is capable of summoning additional enemies called Chiropterus, and the Chiropterror is capable of dealing brutal knockback, flinging players far back into the darkness of the cavern and causing them to take heavy damage from the dark. It is recommended players stay near a wall or corner to minimize knockback taken from the Chiropterror. Once the Chiropterror is killed, a Void Hole will open in the back center of the room. Once all four players are standing within the Void Hole, including any dead/spectating players, they will be teleported to the Power-Up room.
Room #1 Mobs:
| Image | Name | Level | Health | AI Type | Abilities | Elemental Stats | Drops | Location |
|---|---|---|---|---|---|---|---|---|
|
Gaze From The Abyss | 119 | 165,000 | Crawl AI | Wave | Dam Def Weak |
- | Nameless Cave |

|
Shining Chaser | 115 | 84,000 | Charge AI | Blindness Resist Slowness Immune Knockback Immune |
Dam Def |
- | Nameless Cave |
|
Chiropterus | 119 | 60,000 | Melee AI | Slowness Resist Heavy Charge |
Dam |
- | Nameless Cave |
|
Shadowling | 120 | 200,000 | Retreat AI | Invisible Until Approached | - | - | Nameless Cave |
Room #2 mobs:
| Image | Name | Level | Health | AI Type | Abilities | Elemental Stats | Drops | Location |
|---|---|---|---|---|---|---|---|---|
|
Nullard | 120 | 64,000 | Burst Ranged AI | ? | Dam |
- | Flowstone Cavern |
|
Aeronauticus | 112 | ? | Melee AI (Flying) |
? | Dam Def Weak |
- | Flowstone Cavern |
Room #3 mobs:
| Image | Name | Level | Health | AI Type | Abilities | Elemental Stats | Drops | Location |
|---|---|---|---|---|---|---|---|---|

|
Chiropterus | 119 | 60,000 | Melee AI | Slowness Resist Heavy Charge |
Dam |
- | Cave Chamber |
|
Chiropterror | 130 | 3,200,000 | Melee AI | Explode Slowness Resist |
- | - | Cave Chamber |
There is a 1-in-30 chance that the Chiropterror boss in the final chamber is instead replaced by the Lost Eye.
| Image | Name | Level | Health | AI Type | Abilities | Elemental Stats | Drops | Location |
|---|---|---|---|---|---|---|---|---|

|
Lost Eye | 130 | ? | ? | ? | Def |
- | Cave Chamber |
Hunter & Gatherer Room (Weeping Soulroot)
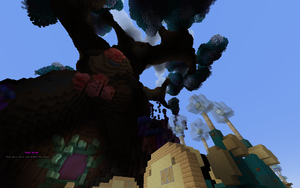
Upon entering the room, players will be on a small beach on the edge of a still gray ocean, and above them will loom the gigantic Weeping Soulroot Tree. In the center of the coastal room is a small altar, and to the far left and right are two large plants which spawn Soul Shrubs inside of them.
Upon a Soul Shrub being destroyed, every player who has dealt any number of damage to the destroyed soul shrub will be notified they have gained a soul, regardless of who destroyed the Shrub. Players cannot have more than one soul. Upon starting this challenge, each player have and start with one soul.
The altar in the middle of the room accepts souls. Standing on the very center of the altar (the end portal frame block) for 5 seconds straight, uninterrupted, will deposit the soul and eject any players on the altar off of it, and cause their team to lose their collective soul, to which another must be gained from destroying another Soul Shrub.
Every time a soul is deposited into the altar, the one and only entrance to the Soulroot Tree will open for a few seconds, then close again after. Any player can enter the Soulroot, however only one can be inside the tree at a time, and any other players attempting to enter will be pushed backwards.
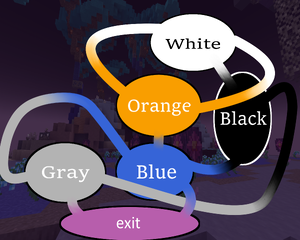
The inside of the Soulroot is a maze with various entrances and exits to five different "grottos", or rooms, however all of the doors between the rooms are closed. A player depositing a soul into the altar outside of the tree will cause all of the doors in the Soulroot maze to open for a few seconds, then close again after. The five different grottos are colored white, orange, black, blue and gray.
Inside of the Soulroot tree, a cave spider miniboss called the Interdimensional Isoptera will spawn inside one of the five rooms (that are not the entry/exit room) at random upon the party first beginning the challenge. When entering the room containing the Isoptera, large text will notify the player entering the room of this. When killed, the Isoptera will drop its heart. This heart must be taken back outside of the Soulroot and placed into one of two slots in the altar. After the Isoptera has been killed and the player that killed it exits the tree, another Isoptera will spawn inside another room at random.
To complete this challenge, the party must work together to unlock doors for the player inside of the Soulroot maze, who must obtain two Isoptera hearts and insert them into the altar outside. Once both slots in the altar have been given Isoptera hearts, the altar's center will open into a black pit, and the text "Enter the Altar" will display on every player's screen. Once all four players are standing within the pit, including any dead/spectating players, they will be teleported to the Power-Up room.
Below is a map of the Weeping Soulroot Tree's maze. This map has been verified as accurate, however does not follow typical directional rules, as in each room in the maze is not aligned/rotated the same way it is in this map. When following this map, the pay attention to how the doors in the maze are situated, rather than following true North on this map.
Mobs that spawn outside of the Soulroot tree:
| Image | Name | Level | Health | AI Type | Abilities | Elemental Stats | Drops | Location |
|---|---|---|---|---|---|---|---|---|
|
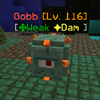
Gobb | 116 | ? | Ranged Hopper AI | Charge | Dam Weak |
- | Weeping Soulroot Coast |
|
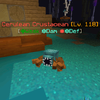
Cerulean Crustacean | 118 | 110,000 | Charge AI | - | Dam Def Weak |
- | Weeping Soulroot Coast |

|
Weeping Root | 120 | ? | Ranged AI | Wave | Dam Def Weak |
- | Weeping Soulroot Coast |
|
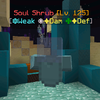
Soul Shrub | 125 | ? | Ranged AI | Arrow Storm | Dam Def Weak |
Soul | Weeping Soulroot Coast |
Mobs that spawn inside the Soulroot tree:
| Image | Name | Level | Health | AI Type | Abilities | Elemental Stats | Drops | Location |
|---|---|---|---|---|---|---|---|---|
|
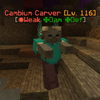
Cambium Carver | 116 | ? | Melee AI | Charge | Dam Def Weak |
- | Soulroot Hollows |
|
Aboreal Aphid Eater | 117 | 60,000 | ? | ? | Dam Def Weak |
- | Soulroot Hollows |

|
Heartwood Healer | 118 | ? | Ranged AI | Heal | Dam Def Weak |
- | Soulroot Hollows |
|
Soul Spitter | 119 | ? | Burst Ranged AI | ? | Dam Weak |
- | Soulroot Hollows |
|
Exploding Pith | 120 | 150,000 | - | Blindness Resist Explode |
Dam |
- | Soulroot Hollows |

|
Interdimensional Isoptera | 125 | 100,000 | Jumper AI | Charge | Dam Def Weak |
Isoptera Heart | Soulroot Hollows |
Room 3
Capture the Bulb Room (Blueshift Wilds)
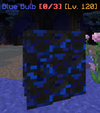
The Blueshift Wilds is the biggest room in the Nameless Anomaly raid. It is a very large, circular room dotted with boulders and trees. In the center of the room are three blue bulbs, all labelled "[0/3]".
Although a large variety of mobs will spawn in the Blueshift Wilds, only two are relevant. Orange Bulb Keepers, holding a giant red bulb above their heads, will periodically spawn near the center of the room. They always spawn near the center, however the time it takes them to spawn is random, and may take several minutes or only a few seconds. Whenever a Bulb Keeper is killed, the player that dealt the lethal blow will gain the red bulb the Bulb Keeper had. While carrying it, the player's attacks and spells will be unusable, and fast-moving hostile mobs called Face Eaters will occasionally spawn around them. Whenever the player carrying the red bulb comes into contact with a blue bulb, the red bulb will disappear and add one to the blue bulb's count.
When a blue bulb's count reaches three, a Void Hole will replace the completed blue bulb, and the text "RUN TO THE EXIT PORTAL!" will display on every player's screen. To complete this challenge, the party must bring three red bulbs to any one blue bulb. Once all four players are standing within the Void Hole, including any dead/spectating players, they will be teleported to the Power-Up room.
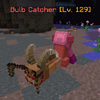
The second mob of relevance is the Bulb Catcher. Pink, crooked creatures called Bulb Catchers will sprinkle the Wilds, and upon spawning they will move in a straight line towards a random blue bulb. Kill them to stop this. If a Bulb Catcher touches a blue bulb, the text "A BULB HAS BEEN TAKEN!" will display on every player's screen, the Bulb Catcher will pick up the bulb, and begin to erratically flee from nearby players. Once killed, the Bulb Catcher will drop the unchanged blue bulb where it died. If the Bulb Catcher is not killed within approximately 8 seconds, the Bulb Catcher will despawn with the blue bulb, causing that bulb to be permanently lost. With every blue bulb lost, the spawn rate of the Bulb Catchers will increase. If all three blue bulbs are taken by Bulb Catchers, the raid will be lost.
These are the mobs that will spawn in the Blueshift Wilds:
| Image | Name | Level | Health | AI Type | Abilities | Elemental Stats | Drops | Location |
|---|---|---|---|---|---|---|---|---|
|
Blue Bulb | 120 | - | - | ? | - | - | Blueshift Wilds |
|
Bulb Catcher | 125 | 45,000 | Bulb Catcher AI | ? | - | Blue Bulb (If Carrying) | Blueshift Wilds |
|
Bulb Keeper | 124 | 500,000 | Melee AI | Charge Knockback Resist Blindness Resist |
Dam Def Weak |
Red Bulb | Blueshift Wilds |
|
Fyren | 122 | ? | Melee AI | Knockback Resist | Dam Def |
- | Blueshift Wilds |
|
Gunge-Gunge | 124 | 100,000 | Jumper AI | ? | Dam Def |
- | Blueshift Wilds |
|
Limboian | 125 | ? | Melee AI | Explode Blindess Resist |
Dam |
- | Blueshift Wilds |

|
Flaring Bombus | 118 | ? | Crawl AI | Self-Destruct Heavy Flamethrower |
Dam Def Weak |
5 Burning Seeds | Blueshift Wilds |

|
Burning Seed | 105 | 500,000 | Melee AI | Charge Explode |
Dam Weak |
- | From Flaring Bombuses |

|
Dernapien | 120 | 600,000 | Ranged AI | Flamethrower | Dam Def Weak |
- | Blueshift Wilds |
|
Face Eater | 106 | ? | ? | - | - | - | Blueshift Wilds |
Gather Room (Twisted Jungle)
The Twisted Jungle is a large ravine split into several different parts. In the center of the Jungle is the Giant Void Hole, which is closed and cannot be entered. Across from the Giant Void Hole are several smaller Void Holes which cannot be entered.
Various mobs will spawn in waves from the small Void Holes across from the Giant Void Hole, and these smaller Void Holes cannot be entered. A mix of hostile and void-eater mobs will spawn from these Void Holes.
The Giant Void Hole in the center has 10 integrity, or "HP". Some mobs that spawn from the waves have blue nametags, notably the Void Eaters, Void Starved, and Void Devourers. Instead of attacking players, these three mobs will move towards the Giant Void Hole, and upon making contact with it will be thrown back and remove 1 HP from it. If the Giant Void Hole's HP reaches 0, the raid will be lost.
Four separate paths branch off from the center of the Twisted Jungle. Each of these contains a small challenge, and once completed will grant the player a singular Void Matter. Unlike challenges from earlier-level raids, each challenge in this room can only be completed once.
To complete this challenge, the party must defend and later open the Giant Void Hole in the center by obtaining 5 Void Matter and depositing it into the Giant Void Hole. The first 4 of these can be obtained from the 4 branching paths from the center, and the last Void Matter can be obtained from the Despairing Crawler.
#1, Void Pedestal Path - On the left of the Giant Void Hole is a large pit with two separate parkours on the left and right of the pit, and a smaller parkour leading to the middle of the pit with a closed Void Hole below it. At the end of the other two parkours are pedestals, and once both pedestals have been interacted with, the Void Hole in the center of the parkour will open. Jumping inside it will present you with the first Void Matter to obtain and simply back out after. Classes with potent movement spells, such as warriors or mages, can effortlessly skip over the left parkour, and can also skip over the right parkour with a little more precision and effort.
#2, Crimson Neuron Path - On the left of the Giant Void Hole is a red, bloody path. At the end of the path is a miniboss called the Dendrite Drifter. Simply killing it will grant you the second Void Matter.
#3, Hatchling Path - On the right of the Giant Void Hole is a small black chasm with rocks floating in it. Void Eggs rest on each rock. You must parkour along the rocks to reach the end of the parkour where the third Void Matter resides, however as you progress the eggs will explode and hatch into Destructive Void Grubs. This parkour also has a Void Hole at the halfway point which, when entered, will place you very close to the edge of the second half of the parkour, so enter with caution.
#4, Tangled Path - On the right of the Giant Void Hole is a large open area with two Malformed Void Hole minibosses. When entering the room, killing the void hole that spawns on the right and further back to the player will grant you the fourth Void Matter. If a Malformed Void Hole successfully damages you, it will teleport you to the other.
#5, Despairing Crawler - After all of the other four Void Matters have been deposited into the Giant Void Hole, the Despairing Crawler will spawn at the end of the next wave of mobs, however the earliest it can spawn is at the end of wave 3. When the Despairing Crawler spawns, it will be temporarily invulnerable until it conjures a Void Hole, and holds it as a shield. While holding the Void Hole, the Despairing Crawler will spawn mobs, some of which are the mobs that will try to attack the Giant Void Hole. When the Despairing Crawler is killed, the player that dealt the lethal blow will obtain the fifth and final Void Matter.
As soon as the fifth Void Matter is inserted into the Giant Void Hole, it will open. Once all four players are standing within the Giant Void Hole, including any dead/spectating players, they will be teleported to the Power-Up room.
Twisted Jungle Mobs:
| Image | Name | Level | Health | AI Type | Abilities | Elemental Stats | Drops | Location |
|---|---|---|---|---|---|---|---|---|

|
Void Matter | 110 | 1 | - | - | - | Void Matter | Twisted Jungle |
|
Void Egg | 106 | 1 | ? | Self-Destruct | - | 1 Destructive Void Grub | Twisted Jungle |
|
Destructive Void Grub | 110 | 35,000 | Melee AI | Self-Destruct | Dam |
- | Twisted Jungle, From Void Eggs |

|
Skull Specter | 110 | 50,000 | Melee AI | - | Dam Def |
- | Twisted Jungle |
|
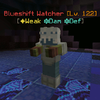
Blueshift Watcher | 122 | 50,000 | Burst Ranged AI | ? | Dam Def Weak |
- | Twisted Jungle |
|
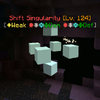
Shift Singularity | 114 | 80,000 | Crawl AI | Blindness Immune | Dam Def Weak |
- | Twisted Jungle |
|
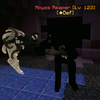
Abyss Reaper | 118 | 120,000 | Melee AI | Knockback Immune Vanish |
Def |
- | Twisted Jungle |
Void Eater mobs:
| Image | Name | Level | Health | AI Type | Abilities | Elemental Stats | Drops | Location |
|---|---|---|---|---|---|---|---|---|

|
Void Eater | 115 | ? | Void Eater AI | ? | - | - | Twisted Jungle |
|
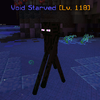
Void Starved | 118 | ? | Void Eater AI | Heavy Teleport | - | - | Twisted Jungle |
|
Void Devourer | 120 | ? | Void Eater AI | ? | - | - | Twisted Jungle |
Minibosses:
| Image | Name | Level | Health | AI Type | Abilities | Elemental Stats | Drops | Location |
|---|---|---|---|---|---|---|---|---|
|
Dendrite Drifter | 120 | ? | Ranged AI | Nascent Explosive* | Dam Def Weak |
Void Matter | Twisted Jungle (Crimson Neuron Path) |
|
Malformed Void Hole | 119 | 200,000 | Melee AI | Twin Voids* Slowness Resist Blindness Resist |
Def |
Void Matter | Twisted Jungle (Deformed Hole Path) |

|
Despairing Crawler | 120 | 1,600,000 | Melee AI | Call the Void* | Def |
Void Matter | Twisted Jungle |
- Nascent Explosive launches a magma cube that will detonate after a few moments.
- Twin Voids causes players who are damaged by one of the twin Malformed Void Holes to teleport to the other.
- Call the Void functions as a summon, where the Despairing Crawler will summon Abyss Reapers or Void Starved from the Void Hole it is carrying.
The Boss Fight
'''The ☐☐☐☐☐ Anomaly''' is the boss of the Nameless Anomaly raid.
The Nameless is a metaphysical entity (a being outside all perceivable human senses) responsible for the tears between the Plane of Physicality, the Void, and The Realm of Darkness. Its visual appearance seems to be skeletal in shape, missing anything below the torso, and possessing two white eyes in an otherwise almost entirely black body. In the ribs of the creature rests a blue orb of sorts, though the purpose and nature of it is presently unknown.
The boss fight against The Nameless takes place on a large, rectangular stone tablet amidst a near-indescribable surrounding.
| Image | Name | Level | Health | AI Type | Abilities | Elemental Stats | Drops | Location |
|---|---|---|---|---|---|---|---|---|

|
The ☐☐☐☐☐ Anomaly | 300 | 22,000,000 | Melee | The Nameless' Spells Blindness Resist Knockback Immunity Slowness Resist Heavy Wave |
Dam Def |
- | Remains of Reality |

|
Sightseeing Interceptor | 30 | - | - | The Watched* | - | - | Remains of Reality |
|
Little One | 118 | ? | Crawl AI | Vanish Charge |
- | Greater One | Remains of Reality |
|
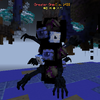
Greater One | 143 | ? | Burst AI | Heavy Arrow Storm | Dam Def |
- | Remains of Reality |
|
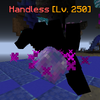
Handless | 250 | - | Charge AI | - | - | - | Remains of Reality |
|
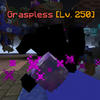
Graspless | 250 | - | Charge AI | - | - | - | Remains of Reality |
The Nameless' Spells
Alongside having Wave, the Nameless has a wide variety of unique spells and ability that are equal parts dangerous as they are bizarre. Many of these attacks can hit multiple times.
Note: Commonly used within the list of the Nameless's spells is a form of damage called true damage. True damage is a unique type of damage that cannot be reduced or shielded against in any way, either through the defense skill, elemental damage reduction, or resistance buffs. In other words, true damage will always deal the exact amount of damage specified. The agility skill also cannot dodge/nullify true damage.
Void Holes: MechanicMany of the spells the Nameless uses will open Void Holes on the arena floor, being either a small or large circle depending on the spell the Nameless used. Due to presumably a bug, the Nameless cannot open Void Holes while it is very close to the edge of the arena. When a player falls into a Void Hole, they will take damage and be teleported to a random, very high up place in the arena, potentially causing a devastating amount of fall damage on landing. The Void Holes only affect players, and both the Nameless nor any of its summons will teleport upon entering one. Every time a player falls through a Void Hole, there is a chance that a Little One will spawn in the Void Hole the player originally entered. Periodically throughout the Nameless's battle, all of the Void Holes will disappear and the arena will return to its default state, however this happens rarely and at set, currently unknown intervals.
Little Ones & Greater OnesEvery time a player falls through a Void Hole, there is a chance that a Little One will spawn in the Void Hole the player originally entered. Little Ones are small masses of eyes that are hostile and only possess the Charge spell, however despite being hostile they are unable to damage players and will only slowly pursue them. Upon being killed, Little Ones will transform into Greater Ones, large, towering amalgams of eyes and arms. Greater Ones attack by shooting bursts of projectiles in the form of wither skulls, and commonly attack by chaining several Arrow Storms together, rapidly firing out thousands of projectiles in a very wide cone and over a long distance, effectively denying safe movement in a very large portion of the arena. Getting caught in the Arrow Storm of a Greater One is enough to stunlock a player and prevent them from moving entirely (due to taking damage too quickly), so it is heavily recommended to stay very far away from Greater Ones and have high DPS players take them out as quickly as possible when Greater Ones are in a problematic area. Greater Ones can also move along the ground, however they move very slowly. Upon being killed, Greater Ones will disappear and will not transform again. SunderThe Nameless fires out four large, short range projectiles in a + shaped pattern, 3-4 times.
EarthshatterThe Nameless emits an eerie curse noise (a differently pitched Elder Guardian's curse sound from vanilla Minecraft), then leaps high up into the air before crashing down, opening a large Void Hole where it lands.
Rend the BarrierThe Nameless will produce a bellowing roar (an Ender Dragon's roar from vanilla Minecraft) before it lunges forward at high velocity towards the player, leaving many small Void Holes in its wake.
Grasp of the ForgottenThe Nameless spawns a left-handed Handless and a right-handed Graspless, which will pursue players at high speeds. The Hands are immune to all damage and cannot be harmed; they will instead vanish after a certain amount of time.
Sow the SeedsThe Nameless will release a cluster of purple blocks (canonically seedpods), which will stick to the ground they land on, emit two ticking noises, and then shortly afterward detonate, dealing damage to players caught in the blasts. The damage received from explosions can stack if a player is caught in multiple blasts at one time.
Denial of FreedomThe Nameless will produce a raspy breath (a Wither's idle breathing from vanilla Minecraft) and emit smoke particles, signifying the start of the attack. After a brief moment, the Nameless will release a cluster of skulls, four for each living player. The skulls are unaffected by gravity and a group of four skulls will pursue each living player. The skulls will dash in a straight line three times each (cued by the "whoosh" sound of a Wither firing its skulls from vanilla Minecraft) before vanishing. The Nameless will cast this spell more frequently if any living players are consistently more than 5 blocks above the ground.
Each skull can hit a player multiple times, and multiple skulls can hit a player at once. Because of this nature, this spell poses lethal danger to airborne players that cannot change their speed or direction very quickly.
Surrender to OblivionThe Nameless spawns several projectiles in the form of pink eyeballs. These eyeballs are grounded and constantly pursue players by slowly moving towards them, exactly like a standard melee mob. These eyeballs cannot be attacked or destroyed, and instead disappear after a set amount of time.
The Void ClaimsA Void Hole will appear above a player's head, following their movements. Players must be on the lookout for themselves and the other members of their party. After a few moments, a hand will reach down from the hole and attempt to grasp at its target, before disappearing entirely.
The Void BleedsThe Nameless spews out a fifteen block line of a blue substance. It can be avoided with movement spells.
The Void HowlsThe Nameless moves quickly towards its target, leaving trails of purple rings in its wake during the attack. This attack is not to be confused with "Rend the Barrier".
The WatchedFunctions as the marker between phase changes.
During this phase change, the Nameless stays in the center of the arena and raises its hands above its head, with the "Sightseeing Interceptor" located just above it. While in this state, the Nameless is invulnerable and cannot be damaged.
While the Watched is active, roughly every two seconds, a random living player will receive the message You are being watched in large text on their screen, accompanied with a horn-like sound effect (an Evoker's Vex summoning sound from vanilla Minecraft). Roughly a second after, a large explosion will go off shortly after where the player was when they received the original "You are being watched" message. This explosion is only targeted at one player at a time, but can damage other player(s) if they are caught in the blast.
|
Raid Power Ups
After each of the three Challenge Rooms, you will be able to choose one of three randomly-selected powerups in the Lost Isle. These powerups go from tier 1 to tier 3 for each challenge you complete. Note that each set of powerups to choose from is independently randomized, so being offered a specific tier 2 powerup in the second room will not necessarily mean that the corresponding tier 3 will be available in the next room.
There is also a Blacksmith hidden to the left of the exit to the Lost Isle.
For further information on the Major IDs provided in some of these powerups, see the Identifications page. Inside the raid, you can right-click each powerup to see a description of their effects.
| Powerup | Tier I Effects | Tier II Effects | Tier III Effects |
|---|---|---|---|
| Hollowed | +2000 Health Bonus +20 Defense +50% Reflection |
+Guardian Major ID +30/5s Mana Regen +50% Thorns |
+4000 Health Bonus +650 Health Regen Raw -40% Damage Bonus |
| Sojourner | +20 Dexterity +20/5s Mana Regen +80% Sprint Regen |
+Freerunner Major ID +30 Defense +40% Spell Damage |
+40 Intelligence +40 Strength -300 Health Regen Raw |
| Fading | +80% Health Regen +40% Walk Speed +Heart of the Pack Major ID |
+60% Water Damage +30 Agility +25/3s Mana Steal |
+Saviour's Sacrifice Major ID -1200 Health Bonus +40 Agility |
| Insidious | +20/3s Mana Steal +20 Intelligence +40% Spell Damage |
-2 Attack Speed Tier +325/4s Life Steal +60% Spell Damage |
+Sorcery Major ID -40% Walk Speed +80% Spell Damage |
| Hopeless | +20 Strength +80% Exploding +100% Main Attack Damage |
+1 Attack Speed Tier +Fission Major ID +30 Dexterity |
+80% Walk Speed -20/5s Mana Regen +250% Main Attack Damage |
Raid Rewards
Once the Nameless is killed, you will be teleported to the Archipelago Periphery where you can claim your reward from a chest. Every player who participated in the raid can claim a reward, so long as the Nameless was successfully defeated. Raid rewards may include raid exclusive rewards, such as Mastery Tomes and Corkian Amplifiers as well as the Charm of the Void. It will also include several stacks of emerald blocks, sometimes raid-exclusive fabled items, and horses. Other rewards include broken dungeon keys, teleport scrolls to Ahmsord and Lutho, and powders.
| Icon | Item | Quantity[1] | Lv. Min | Notes |
|---|---|---|---|---|
| Emerald Blocks | 120-264 | - | - | |
| Tomes of Weapon Mastery III | 1-4[2] | 105 | Includes Fabled and Mythic Tier III tomes. | |
| Tome of Slaying Mastery III | 105 | - | ||
| Tome of Dungeoneering Mastery III | 105 | - | ||
| Tome of Gathering Mastery III | 105 | - | ||
| Forbearance | 1 | 105 | - | |
| Ingress | 1 | 105 | - | |
| Breakthrough | 1 | 105 | - | |
| Detachment | 1 | 105 | - | |
| Collection | 1 | 105 | - | |
| Simulacrum | 1 | 105 | - | |
| Nonexistence | 1 | 105 | Part of the Boundless Set. | |
| Aleph Null | 1 | 105 | ||
| Divergence | 1 | 105 | ||
| Infinitesimal | 1 | 105 | ||
| Continuum | 1 | 105 | ||
| Recursion | 1 | 105 | ||
| Fractal | 1 | 105 | ||
| Charm of the Void | 1 | 105 | - | |
| Ability Shards | 1-2 | - | - | |
| Corkian Amplifier II | 1-10 | - | - | |
| Corkian Amplifier III | 1-5 | - | - | |
| Tier VI Powders | 1-8 | - | Powders may be of any Element. | |
| Nii Runes | 1-12 | - | - | |
| Uth Runes | 1-4 | - | - | |
| Tol Runes | 1-4 | - | - | |
| Broken Infested Pit Keys | ? | 74 | - | |
| Broken Ice Barrows Keys | 1-8 | 90 | - | |
| Broken Undergrowth Ruins Keys | ? | 94 | - | |
| Broken Galleon's Graveyard Keys | 1-2 | 98 | - | |
| Ahmsord Teleport Scrolls | 3 | - | - | |
| Lutho Teleport Scrolls | 3 | - | - | |
| Black Horse | 1 | - | - | |
| Chestnut Horse | 1 | - | - |
Tips and Tricks
- Since the cost of entering this raid is relatively expensive, it is WynnCraft custom for the other 3 party members to give 1 Tol rune each to the party leader per raid attempt.
- If you do not have Tol runes, paying the market price in emerald blocks (usually 12-14) or the lesser rune equivilent instead of 1 tol rune is also acceptable, depending on your party leader.
- Despite this custom, buying Tol runes off of the Trade Market and successfully completing this raid (even half of the attempted runs) will still net profit considerable emeralds.
- If another party has started the raid in your world and you attempt to start it, your party will be moved to another world without any cost.
- It is not recommended for players inexperienced to the Nameless Anomaly to take the Berserker Berry, be the Lightbearer, or enter the Weeping Soulroot maze.
- It is recommended for classes that can damage large groups with their main attack (such as shamans or mages or archers) to take the Berserker Berry, to deal more damage to the Void Rifts and attack through any newly-spawned falling mobs respectively.
- It is a good idea to use a weapon with powder specials when taking the Berserker Berry, as a few hits will fully charge it. Chain lightning is especially potent, as it can hit multiple Void Rifts when it triggers, saving a lot of time.
- Dying in this raid will not cause you to lose any Soul Points.
- Because of this, players can /kill in the buff rooms to immediately respawn, receiving a full heal and no Soul Point loss.
- Be careful, if you /kill too quickly after entering the buff rooms, you will respawn in the previous challenge room and will not be able to continue the raid. It is recommended you pick a buff, then /kill.
- Because you still regenerate Soul Points in the raid and also cannot lose them there, you can also use /kill to get back to Lutho quickly after you have finished the raid.
- If you are ever disconnected from WynnCraft during a raid, if you rejoin WynnCraft's lobby (lobby.wynncraft.com) and rejoin the world you were in prior, you will be reconnected from the raid, however you will be spectating as if you were killed. You will respawn in the next room.
- Due to a glitch in vanilla Minecraft that is not from WynnCraft, players may sometimes become invisible to others in the raid. If you have a WynnCraft disguise, turning any disguise on and back off again will make you visible to other players.
- Alternatively, moving out of the view distance for other players and moving back in will do the same.
- It is strongly advised players communicate with each other aptly during the raid, as strong teamwork is a necessity to complete the raid.
- The Shaman's Aura is very useful for quickly clearing the large waves of enemies in the Gather room.
- It is advised for the Lightbearer to move slowly in the Dark Room so that other players do not have trouble keeping up with them.
- Knockback is consistently a problem on the outside portion of the Tree Maze room, as mobs can very easily knock you off the altar. There are a few ways to deal with this.
- The Weeping Root mobs should be kill-on-sight, as their Wave spell can push players off the altar.
- If two or more players are surviving on the outside, it is a good idea to have one player deposit the soul while the other player(s) guard them from mobs. During this, the soul depositor should not attack so they do not draw the aggro of mobs around them.
- The party will already start with one soul in the Tree Maze room, however this is never mentioned in-game.
- When fighting the twin Malformed Void Holes, players should be cautious of their teleport ability accidentally warping them into the Twisted Jungle's terrain. This can be avoided as long as both of the Malformed Void Holes are away from the walls.
- Some of the Nameless's attacks can be avoided by purposely falling into a Void Hole, however, this will deal damage to you and spawn a Little One. It will also leave you very vulnerable to the Nameless's attack "Denial of Freedom".
- The Nameless's attacks that usually create Void Holes will not create them if the Nameless is very close to the edge of the arena.
- When high DPS players are maintaining the Nameless's aggro, it is custom for them to circle (preferably counterclockwise) around the edge of the arena, so other players know where the Nameless is going to move, and thus can damage it more easily.
- It is highly recommended to keep game sound on or play with subtitles while fighting the Nameless Anomaly, as most of its notable attacks are sound-cued.
- If you are playing on Wynntills and/or Minecraft version 1.12, Minecraft has a bug with sounds cutting out/suddenly muting when too many are playing at once. This can cause some of the Nameless's sound cues to become inaudible to you. The Forge mod "ExtendPolyphonyLimit" fixes this bug.
Trivia
- The Wynncraft community has coined the unofficial, underwhelming nickname "Greg" for the Nameless Anomaly itself. The community also repeatedly refers to "Greg" as male, however the Nameless's sex, gender or pronouns have never been confirmed.
- The "Nameless" part of the Nameless Anomaly's nametag is obfuscated, being 5 obfuscated characters.
- The obfuscated text reads, as seen in early runs of the raid during the HERO Beta, '12345'.
- Notably, the Nameless's appearance resembles that of the A Hunter's Calling questgiver (black, skeletal appearance, floating torso with no legs), who in turn resembles the removed, former Realm of Light NPCs; the Heliolux.
- The background of the boss room is upside-down.
- Several enemies have their own unique pieces of lore, are references to other pieces of content in game, or have peculiar pieces of trivia surrounding them.
- The Destructive Void Grub is a reference to the Void Grub mobs present in two of the Void segments in A Journey Further.
- The Metaphysical Walker from the Hold Room is also a reference to A Journey Further, being a sideways version of Upside-Downer.
- The Dendrite Drifter is shaped like a Brain, as a Dendrite is a branching extension of neuron cells.
- The Monochromatism is a reference to Nexus of Light’s Polychromatism.
- Each of the mobs in the Flooding Canyon room can be tied to an area of the Wynn Province.
- The Glow Bug would be a spider from Nivla Woods.
- The Azure Necromancer would be a necromancer from Ancient Nemract.
- The Void Vassal would be from the Almuj Desert.
- The Ultramarine Warrior would be from the Nesaak Forest.
- The Void Dukun would be from the Jungle.
- Greater One is a larger, grown variation of Little One.
- Little One is a reference to the LITTLE ONES from OMORI.
- The secret Lost Eye miniboss in the Dark Room is based on an unused mob originally designed for the challenge, the Guiding Light. The Guiding Light would function similarly to the Shadowlings, being invisible until approached; however, unlike the Shadowlings, it would actively deceive players by giving off fake light, pretending to be the Lightbearer to kill the players.
- The Flaring Bombus is a crucial aspect of the Archipelago’s wilderness. It grows on the trees, and it releases flaming pods that burn the area, fertilizing the ground and giving way for new growths from the enriched soil, encouraging seed pods to become new trees.
- Real world plants, such as redwood trees, giant sequoia, or even the Eucalyptus which produces extremely flammable oils to promote the spread of fire, are known as Pyrophytes. The trees in The Nameless Anomaly are likely similar, having grown an adaptation to fire and integrated it into the maturation and reproduction process.
- ’Gunge’ both refers to a clot and the action of clotting, making ‘Gunge-Gunge’ essentially mean Clotting Clot, Choking Glob, or Sticking Slime.
- Dernapien is a portmanteau of "Dern" and "Sapien", Dern being the Realm of Darkness and Sapien being humanity and humankind (I.e, Homo Sapiens).
- This, in turn, implies that Dernapiens are some form of Dernic kindred to Humans.
- Bulb Keepers are also Dernapiens.
- Nocturnal Witness resembles the Eyefolk of the Eyeball Forest, most notably a Blinder. Instead of being made of veins like its kin, however, it appears to be composed of a viscous substance.
- Nocturnal Witness' original skin concept was very loosely based off of a biblical angel.
- The Nocturnal Witness could be based off of the Athanatic Witness from Orphion's Nexus of Light.
- The Handless is left-handed, while The Graspless is right-handed.
- The Nameless itself is a creature Dernic origin, being an entity native to the Realm of Darkness that seeks to escape it.
- The Nameless is the only raid boss without a title.
- Pre-HERO Beta, there was not a single instance of the raid being completed without cheating during the Raid.
- The raid awards six fableds total; two rings, two bracelets, and two necklaces.
- Detachment, Simulacrum, and Ingress are references the three stages one would experience when passing from physical reality to the Void: Detaching from physicality, (possibly) producing a non-physical Simulacrum, and ultimately the Ingress into the archipelago where the raid takes place.
- The necklace "Collection" replaced the previous necklace "Exhibition".
- Upon completing the Raid, under the RAID COMPLETED! message, the title, Beyond Void will flicker with text saying The Nameless Anomaly (with Nameless being obfuscated) briefly appearing underneath it.
- The Dark Room’s mechanic where you take damage in darkness is a direct reference to Don’t Starve and Don’t Starve Together, where you take damage in darkness from an unseen character named Charlie.
| This page contains spoilers. Readers are discouraged from continuing if they want to discover features by themselves. |
This page contains spoilers. Readers are discouraged from continuing if they want to discover features by themselves.
In-Game Lore
Throughout the Nameless Anomaly raid, an unknown informant will tell the players about the nature of the Nameless Anomaly, how it came to be, and its purpose in the ongoing War of the Realms. Upon entering each challenge room, buff room, and the passage leading up to the Nameless, a piece of dialogue will appear. All together, they form the following cohesive story:
Spoiler! The hidden text contains spoilers relating to the Nameless Anomaly lore.
|
The Realm of Influence is named aptly- abominably powerful forces selfishly lay claim to it, and with their command change that realm in their image.
This is not the first battle. It may not be the last. It is a slow war, with victories measured in mere meters. But the dark lays victorious yet. The dark eroded at what it wished to claim, voraciously consuming the crumbling pieces. The holes left behind, devoid of physicality and presence, twist upon themselves. Gaps in reality, bridging realms in the subtlest of ways. Only fools could name the aftermath as subtle- paradoxes, stealing existence under the banner of dark greed. These gaps grow, inexorably, and encroach upon one another. What is overlapped returns to a world unseen and alien- Less than what used to be taken, but taken all the same. A critical point approaches- the wider the gap, the more it consumes. The more it consumes, the wider the gap becomes. Victories will be measured in the redrawing of maps. |
Additionally, the boss area has Ancient Wynnic carved into the arena, albeit it is nigh-unreadable while fighting.
Spoiler! The hidden text contains spoilers relating to The Nameless Anomaly (Raid).
|
The arena itself is a large stone tablet, which possesses Ancient Wynnic carved into the face of it by The Nameless. Though very faint and difficult to make out, the scrawlings read as follows:
I WANT OUT. IT'S HERE. OUT LIE IN. |

